- Published on
Image Classification with Roboflow
- Authors

- Name
- Lenny The Racoon
- @lennytheracoon
How to Classify Images with Roboflow
Using Roboflow, you can classify images. First, create an account on the Roboflow website. Then, create a new project in the Roboflow dashboard.
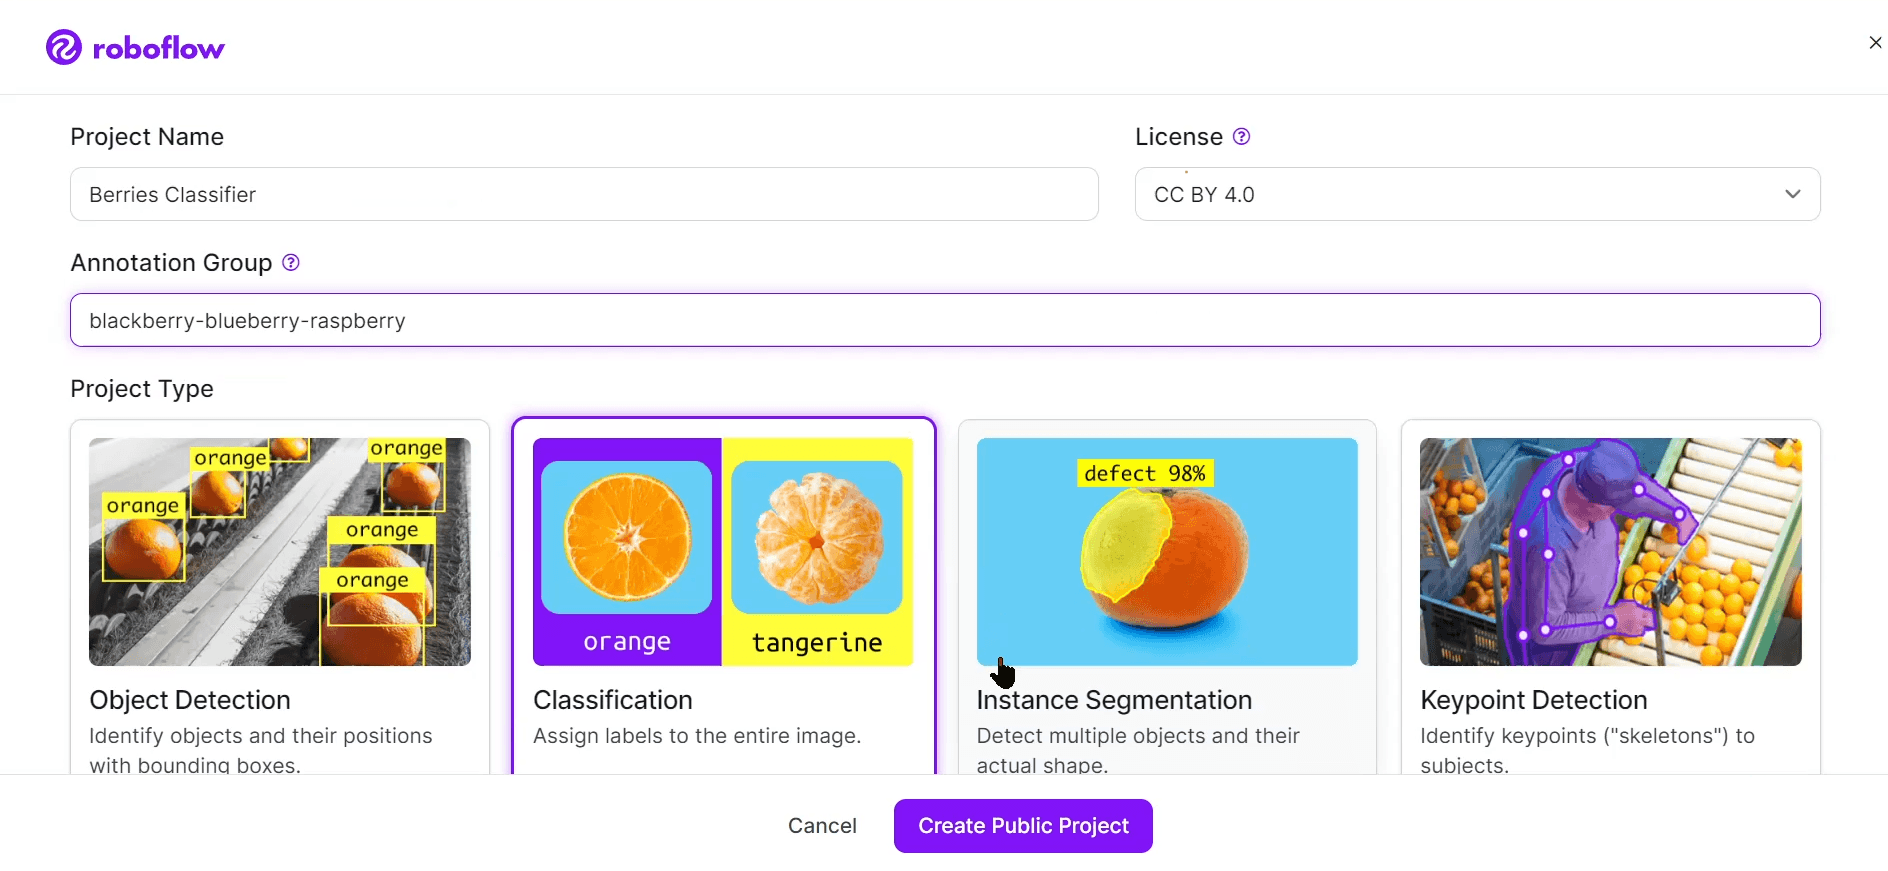
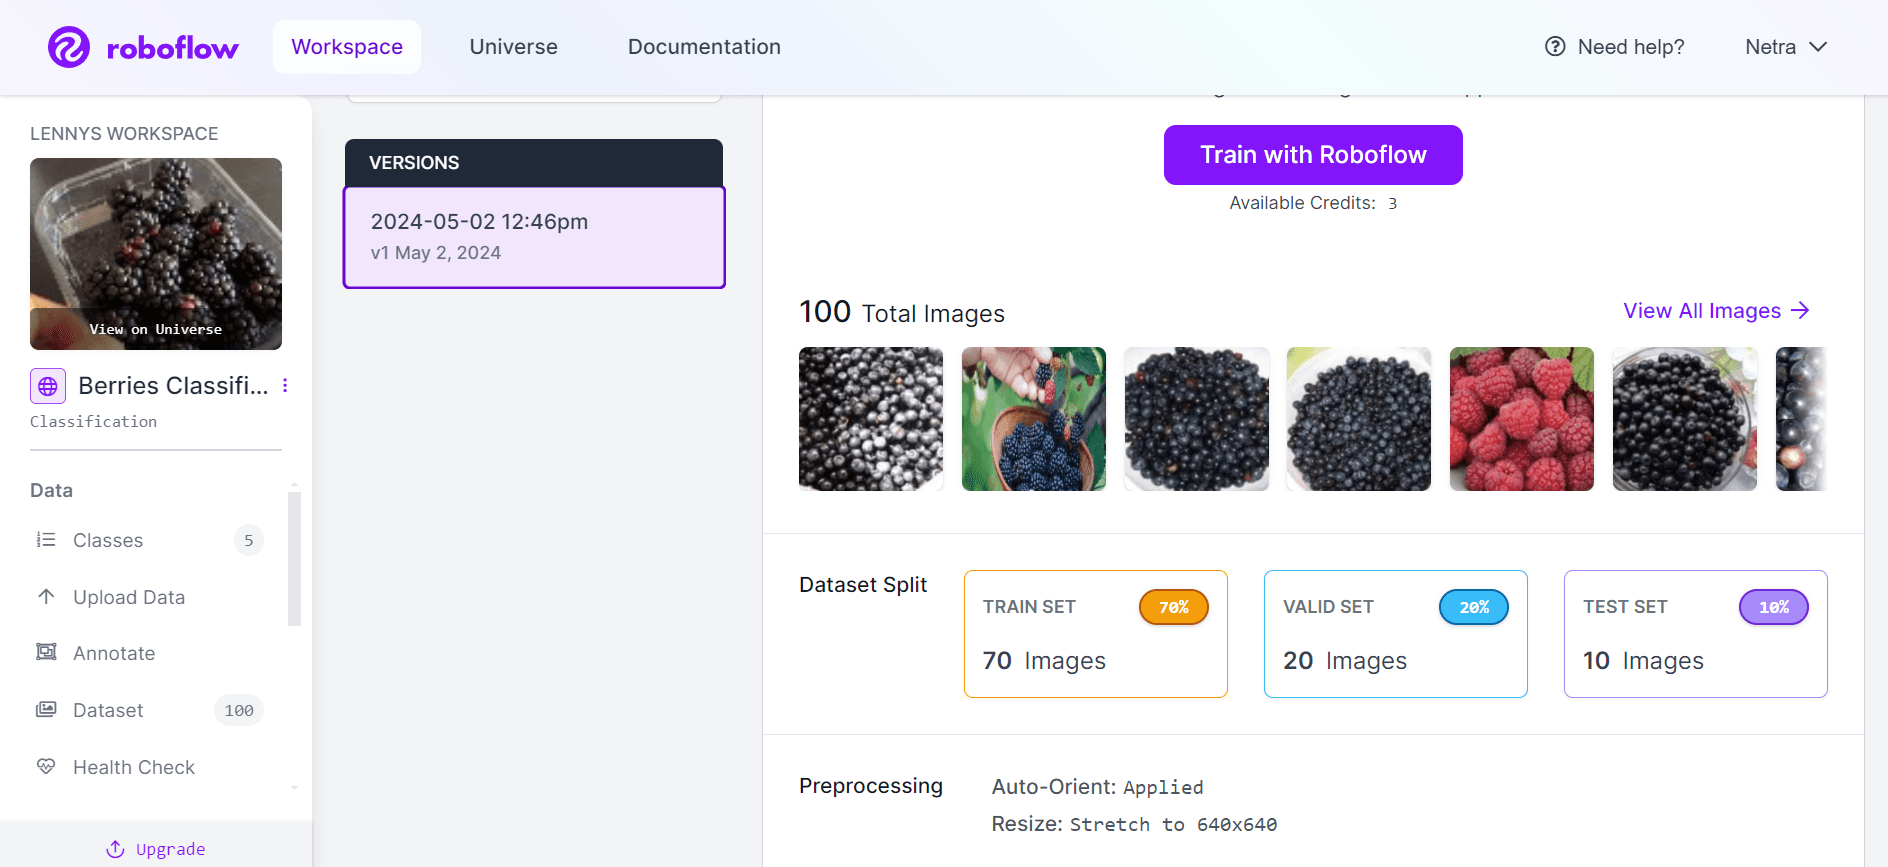
For our example, let’s create a project that classifies 'berries' from an image. Specifically, we want to find a label that describes whether an image contains a Strawberry, Blackberry, Blueberry, or Raspberry. In business, this could be used to build a database that aids in searching images and videos. If the berry in an image is in our list of berries we can identify, we should be given a classification; otherwise, we should get no result. Let’s call our project “Berries Classifier”.
Select the “Multi-label image classification” label in the “Project Type” dropdown. Here’s how your project should look:
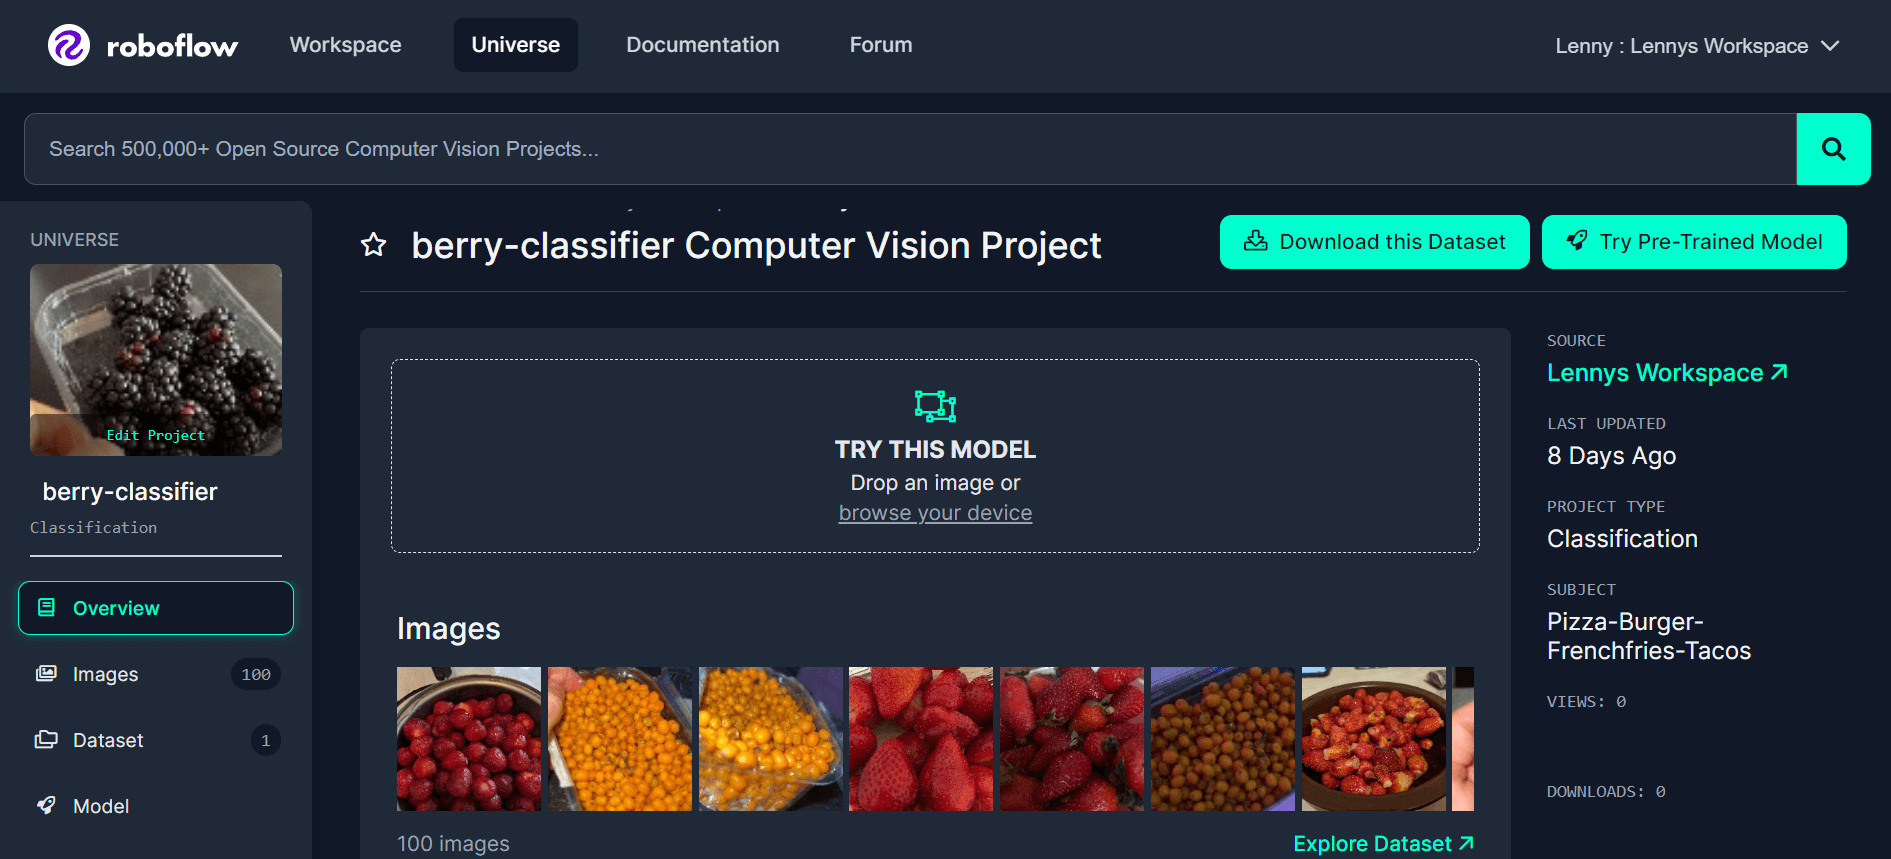
Let’s start by copying a Berry Classification dataset from Roboflow Universe.
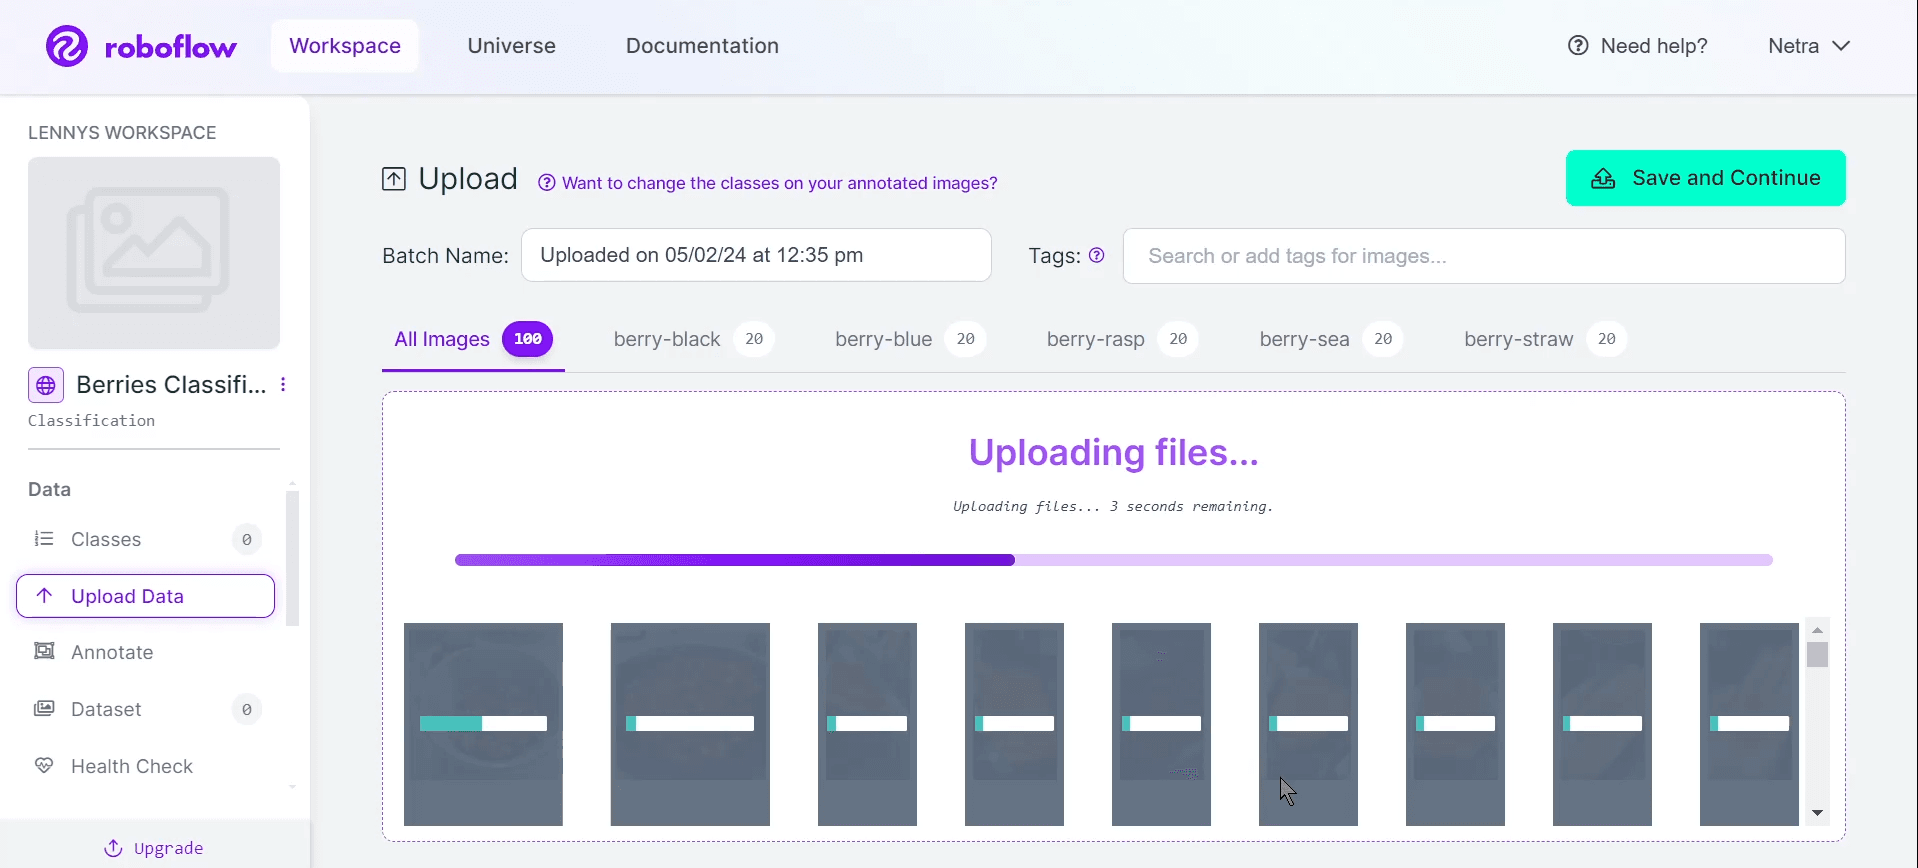
Next, let’s download the dataset and upload it into our new project in the Roboflow application:
We now have the data we need to perform our image classification. But, we don’t have a model yet. That’s our next step. To start classifying images, we need to train a model. To prepare to train our model, we need to:
- Click “Save and continue” once all of our images are in Roboflow in the page where we uploaded our images above.
- Select a train test split from the pop up. You should click on the Method form and then click “Split images between train/valid/test” to make sure your images are split property. 70% of images will go in your training set, 20% go in your validation set, and 10% go in your testing set.
- Click “Approve All” and “Add Approved to Dataset” once all of your images are uploaded to add your images to your model. Then, click “Add images”.
- Click the “Generate a new version” button.
- Now, we’re ready to train our model.
The “Generate a new version” button takes you to a page that lets you customize your new version of your model. For now, let’s leave all values the same as they are. We can click “Generate” in the final tab on the page.
Next, we need to click “Train with Roboflow” on the training dashboard so that Roboflow knows you are ready to train the version of the model you just created.
Now, we need to wait for our model to train. This can take anywhere from a few minutes to a few hours, depending on how large your dataset is. Make a cup of your caffeinated beverage of choice and come back to the Roboflow dashboard when you get an email notifying you that your project has been trained.
Once you have a trained model, you can start to use it. Click the “Deploy” tab, where you will see many different ways in which you can deploy your model. For this example, we’re going to upload an image from the internet and see how it is classified. Let’s upload an image of a berries and see what happens:
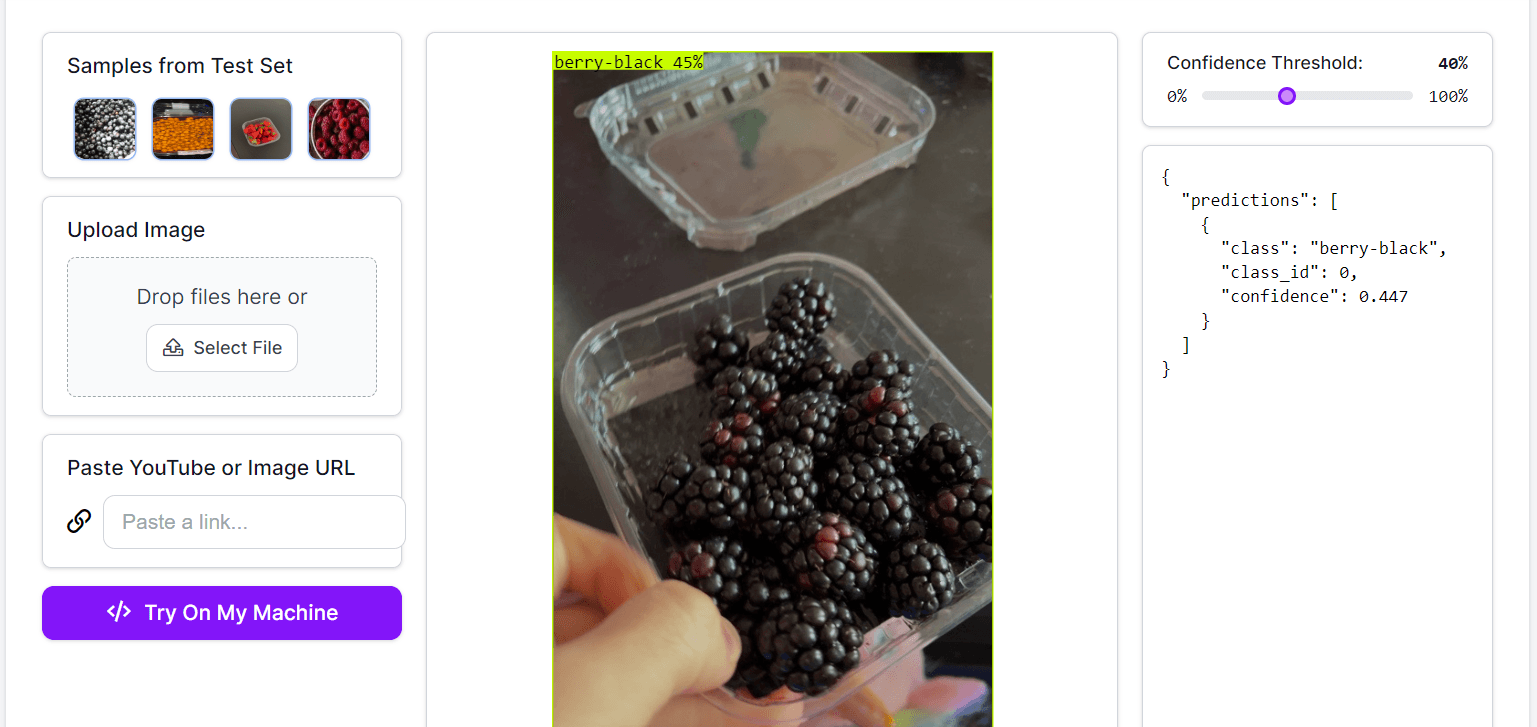
Our image has been given the label “berry-black” with a confidence rate of 44%. Our image classification model is working!
Using this same approach, you can generate classification models for a vast range of different problems, from detecting defects in a production pipeline to classifying animals that are found on a farm.
Now you have the skills you need to generate an image classification model. If data does not already exist for your problem, however, you will need to annotate images yourself.
Conclusion
Image classification is useful for solving problems where you need to classify an object into one of multiple groups. This computer vision algorithm has wide uses across industries, from content moderation to defect monitoring.